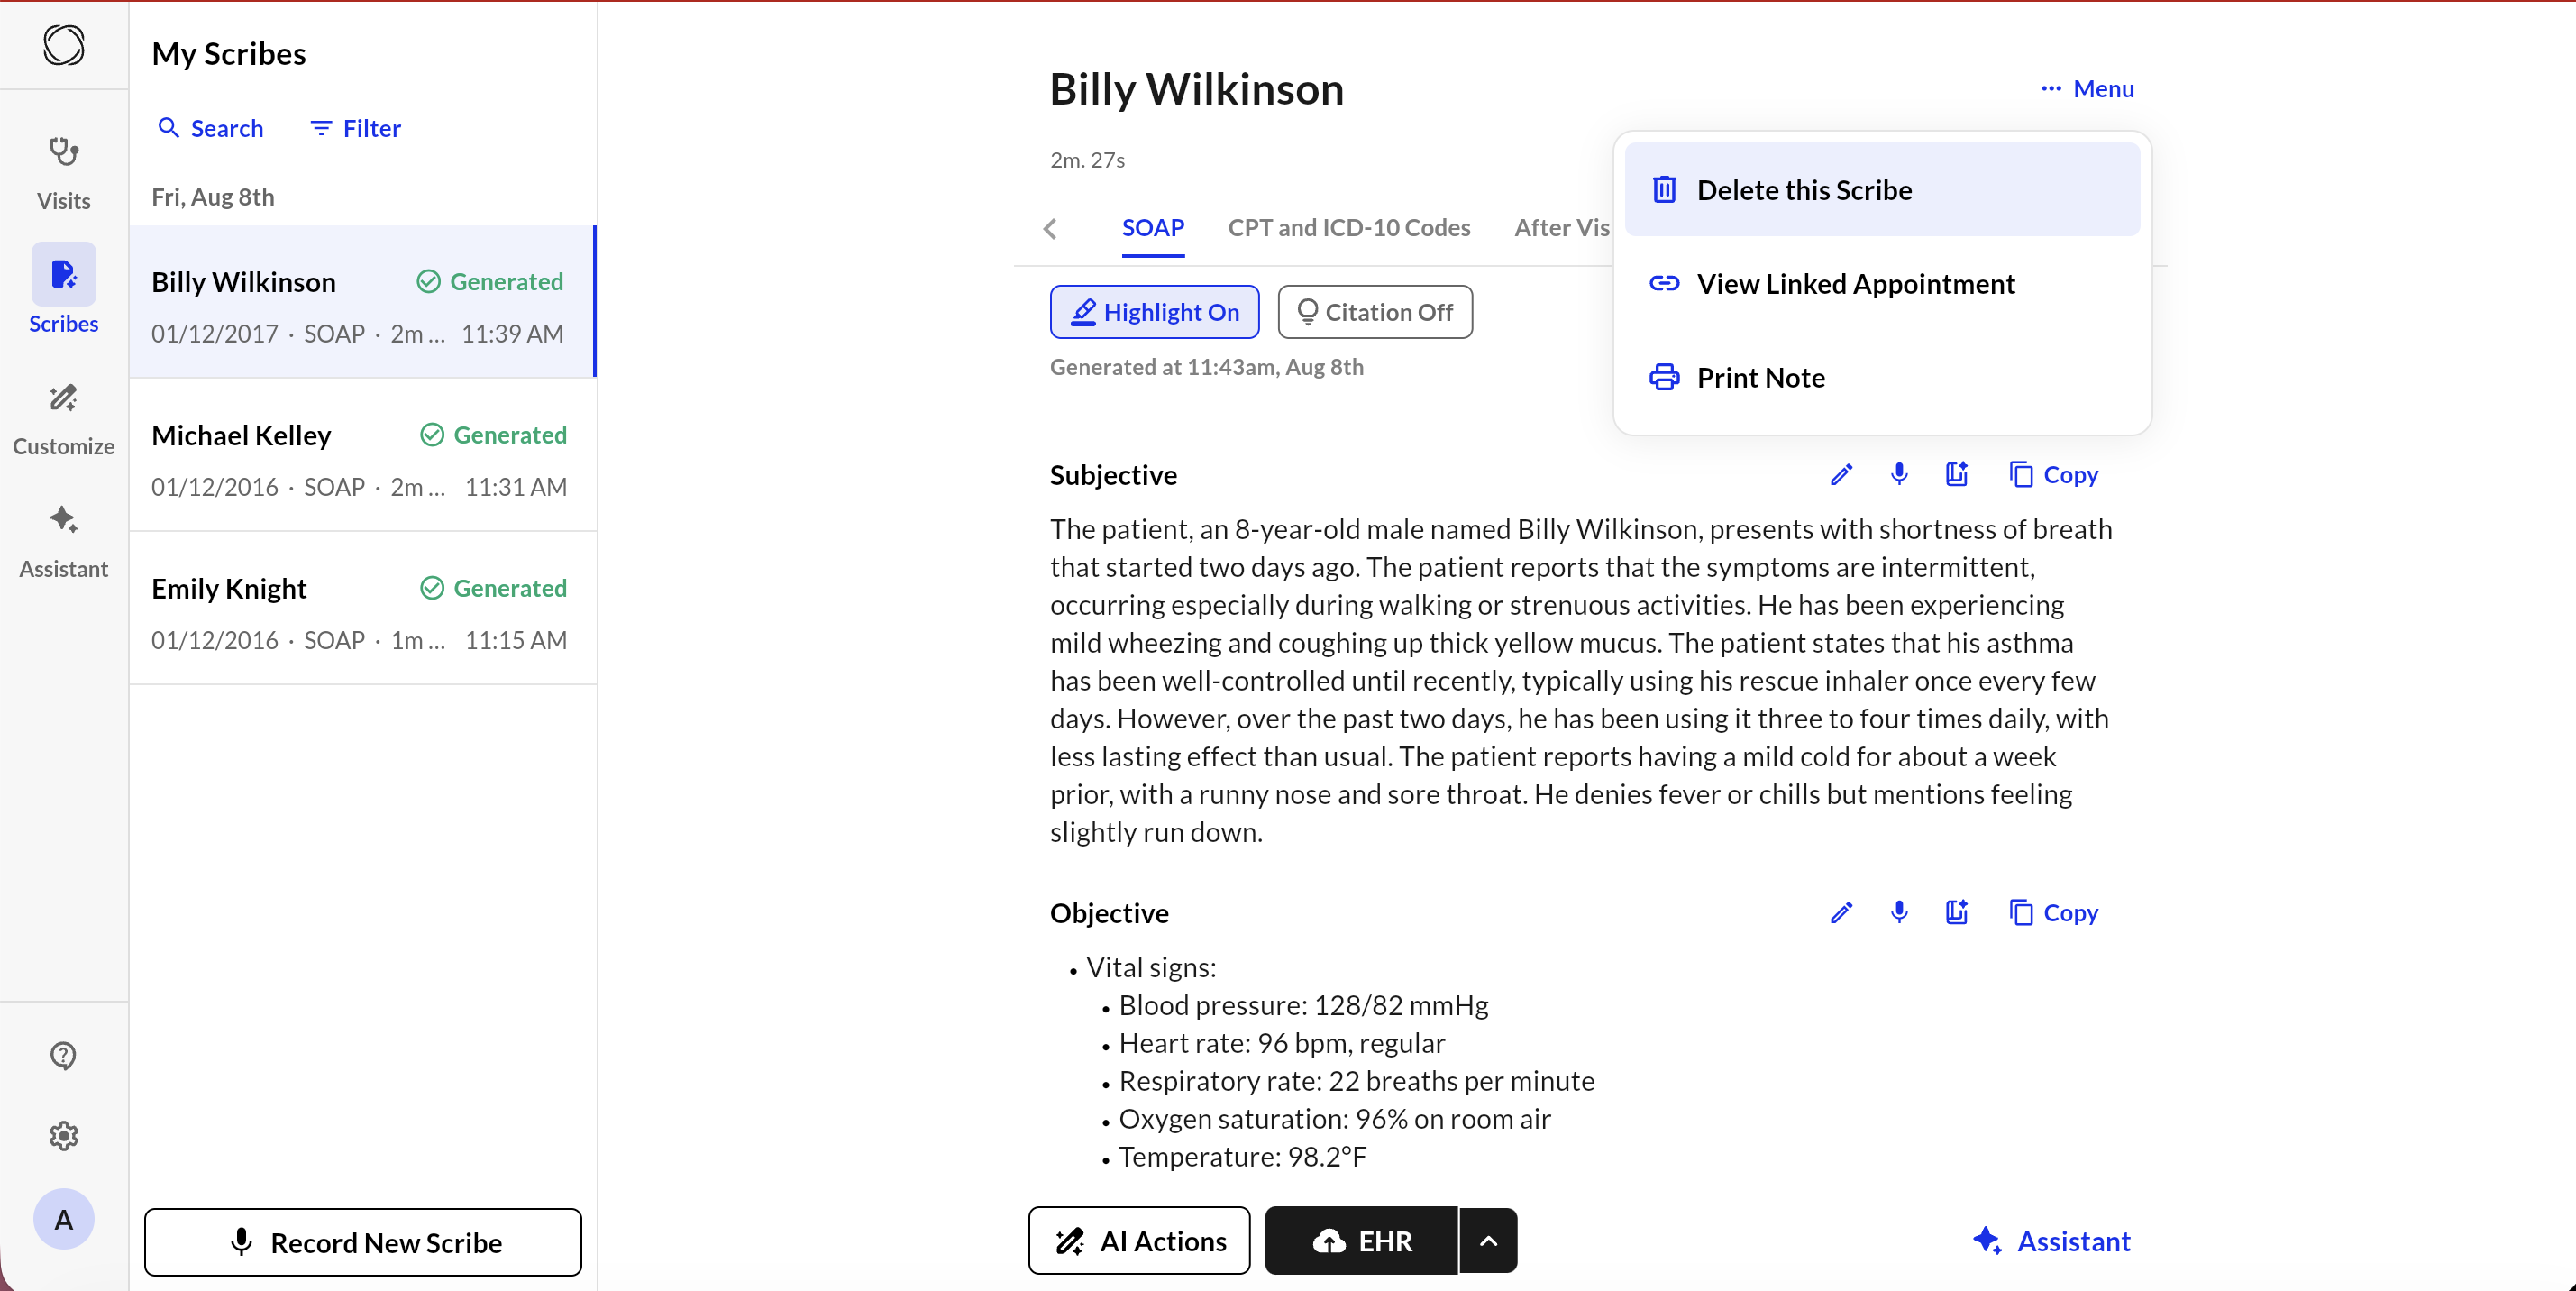

View your generated Scribe
Once your Scribe has been generated, you have several options for what to do next: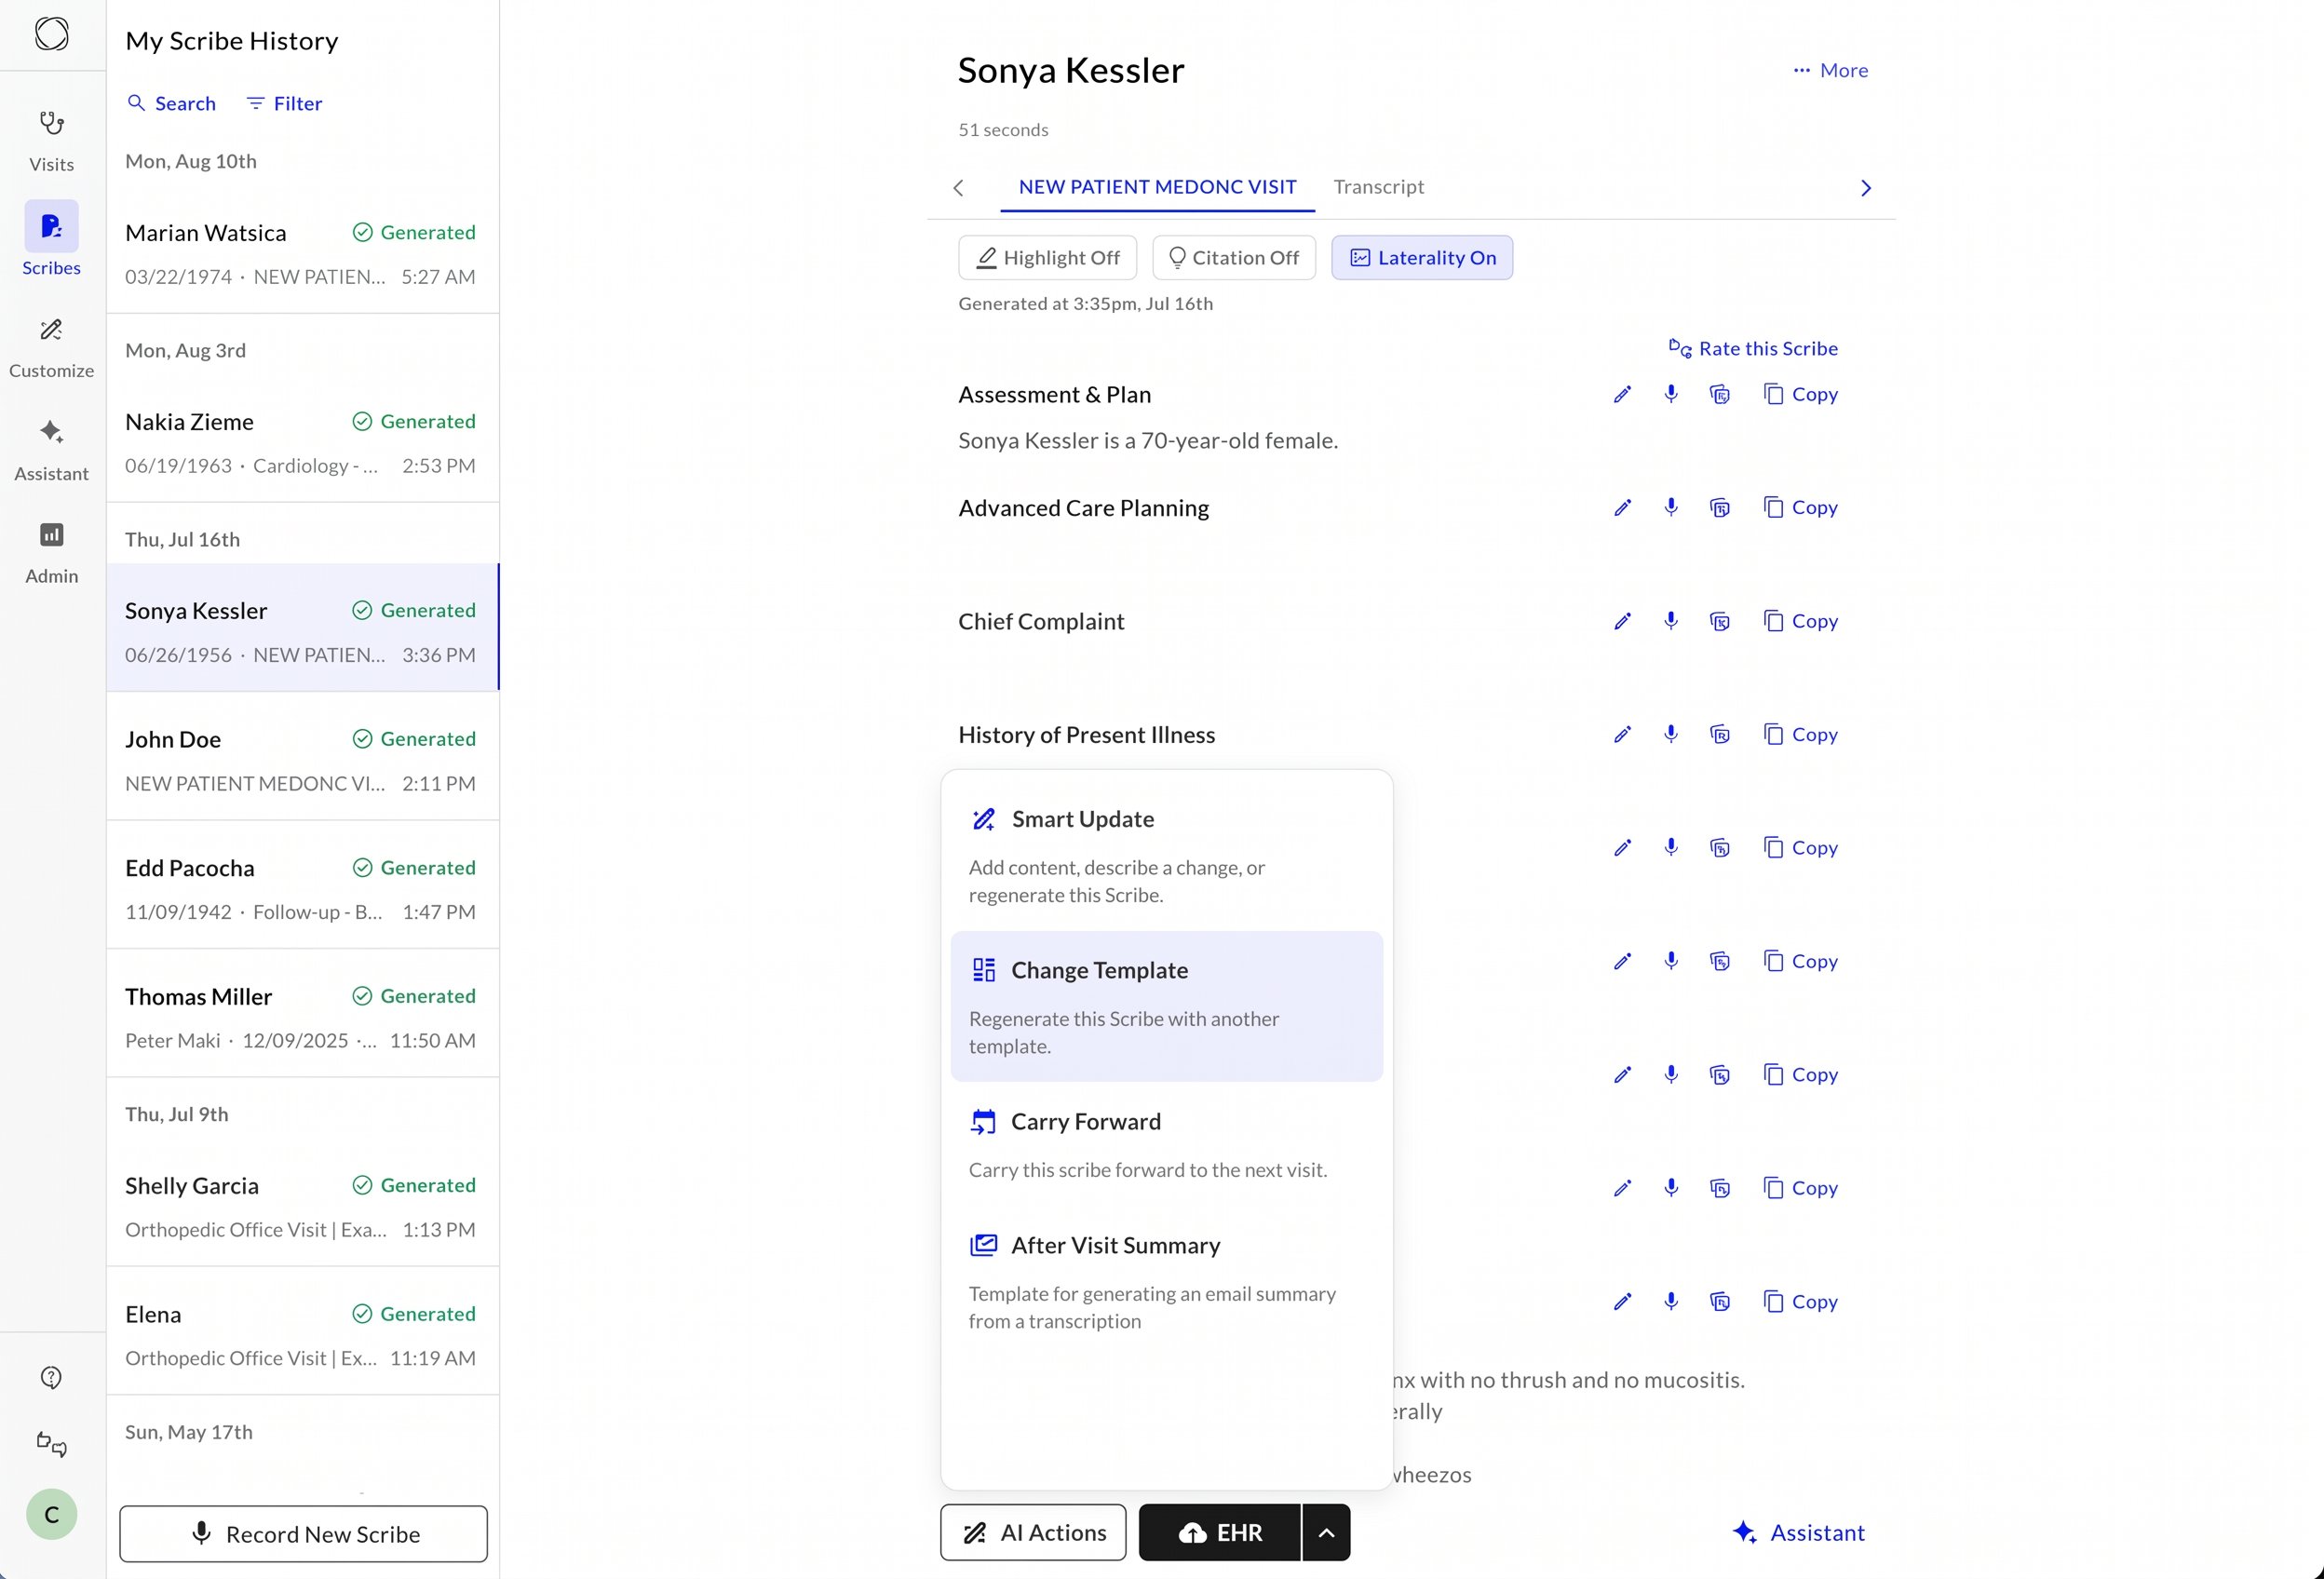
- Copy the Note
Use the “Copy All” button to copy the entire note to your clipboard. You can then paste it into your EHR or any other documentation system. - Provide Feedback using “Rate this Scribe”
Rate the quality of the note and provide feedback to help improve future Scribe notes. - Update the Note (Smart Update)
Use “AI Actions → Smart Update” to edit specific sections, regenerate the entire note, or add a timestamped re-evaluation, all from one place. See Smart Update below. - Transfer to EHR
Follow the steps to transfer your note into your EHR system. See Transfer Your Note to EHR for detailed instructions.
New: Smart Update replaces the separate Smart Edit and Regenerate actions, combining them with Add Re-evaluation into a single workflow. Learn more ↓
AI Actions
[New] Smart Update
Smart Update consolidates Smart Edit, Regenerate, and Add Re-evaluation into a single, unified action. You can now update a note end-to-end from one place, with the option to target specific sections or the entire document.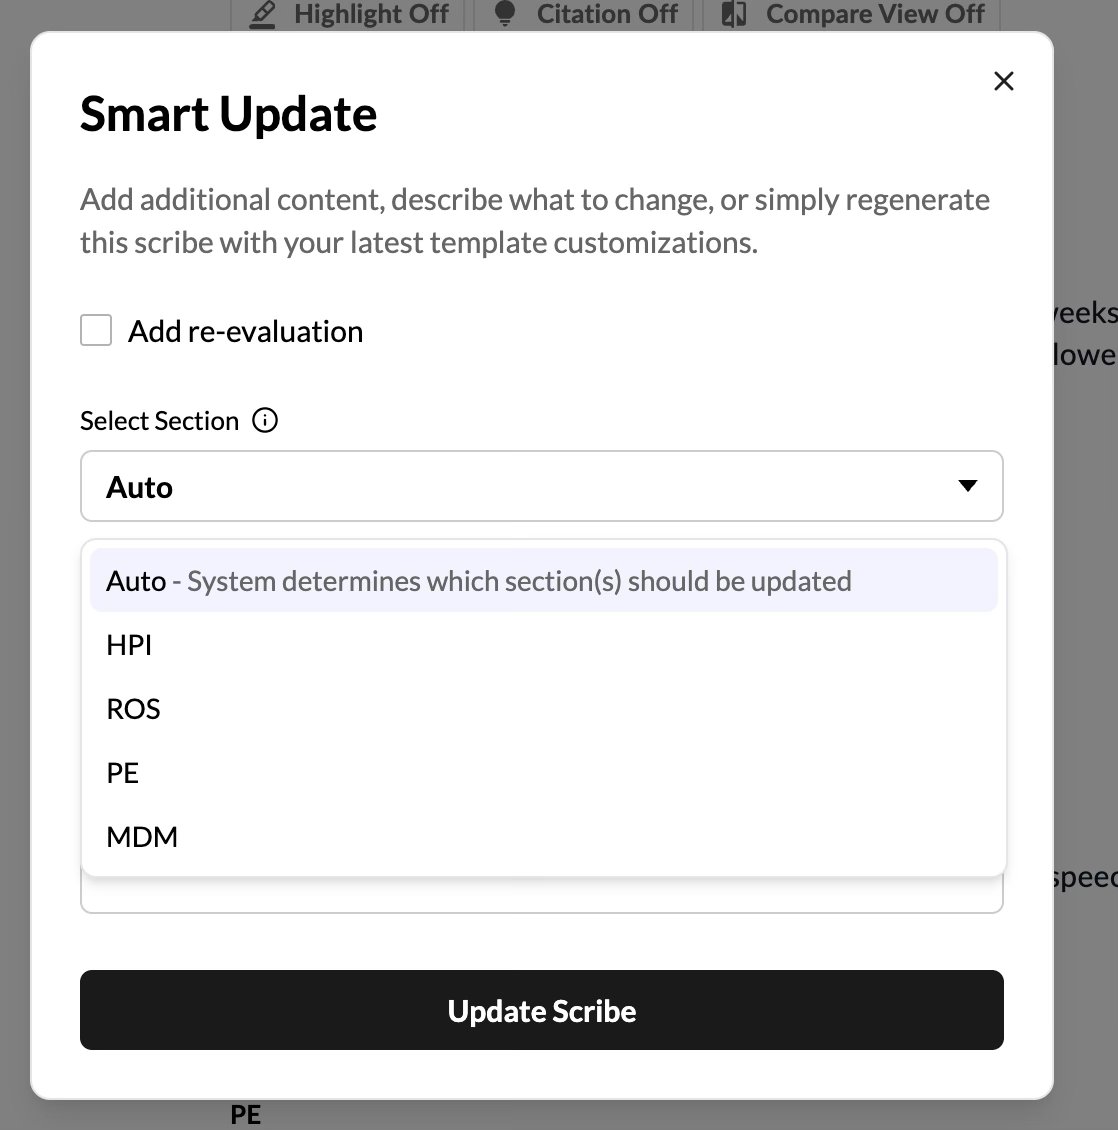
Section targeting (Auto by default)
- Open a generated Scribe and click AI Actions → Smart Update.
- From the “Select Section” dropdown, choose a specific section to update (e.g., “History of Present Illness”) or leave it on Auto to let the system decide which sections to update.
- Provide context by typing, clicking the mic to record audio, or clicking Dictate.
- You can also submit with no input at all to simply refresh the note using your latest template and custom formatting [Regenerate Action]
- Click Update Scribe to apply the changes. The note will immediately switch to its loading state.
- Comprehensive Generation: The update utilizes all available context, including the transcript, your current note (with manual edits), prior smart edits, your new input, and the latest template formatting.
- Recording Safeguards: A live waveform and timer run while recording. Closing the window mid-recording is blocked by a “Recording in progress” banner to prevent data loss.
- Discard Audio: A close control on the captured-audio box allows you to easily clear a bad take.
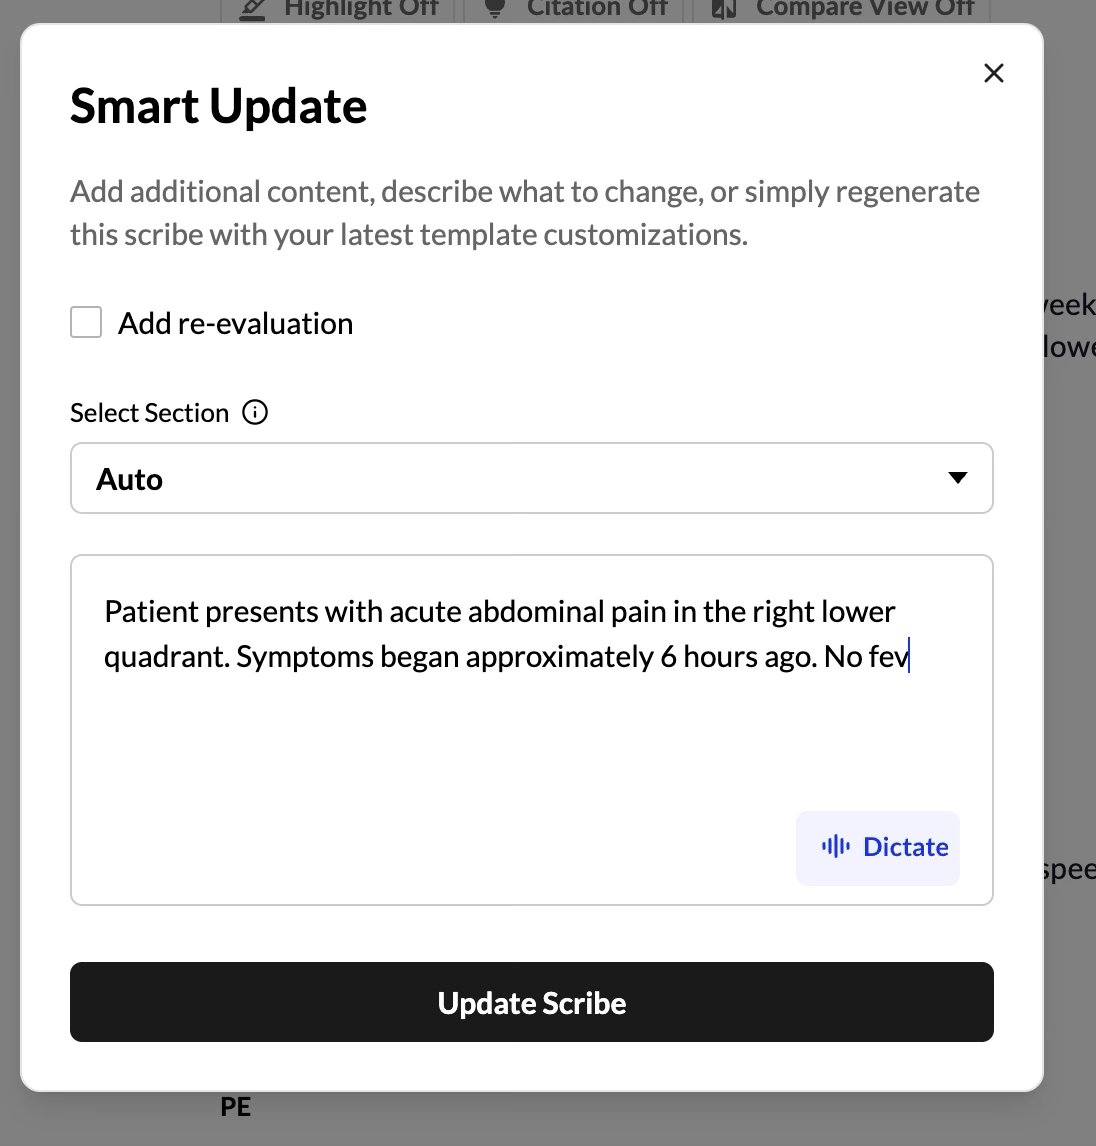
Type, record, or dictate
[New] Smart Update: Re-evaluations
By checking “Add re-evaluation” within Smart Update, you can append timestamped content directly to a specific section rather than rewriting the section entirely.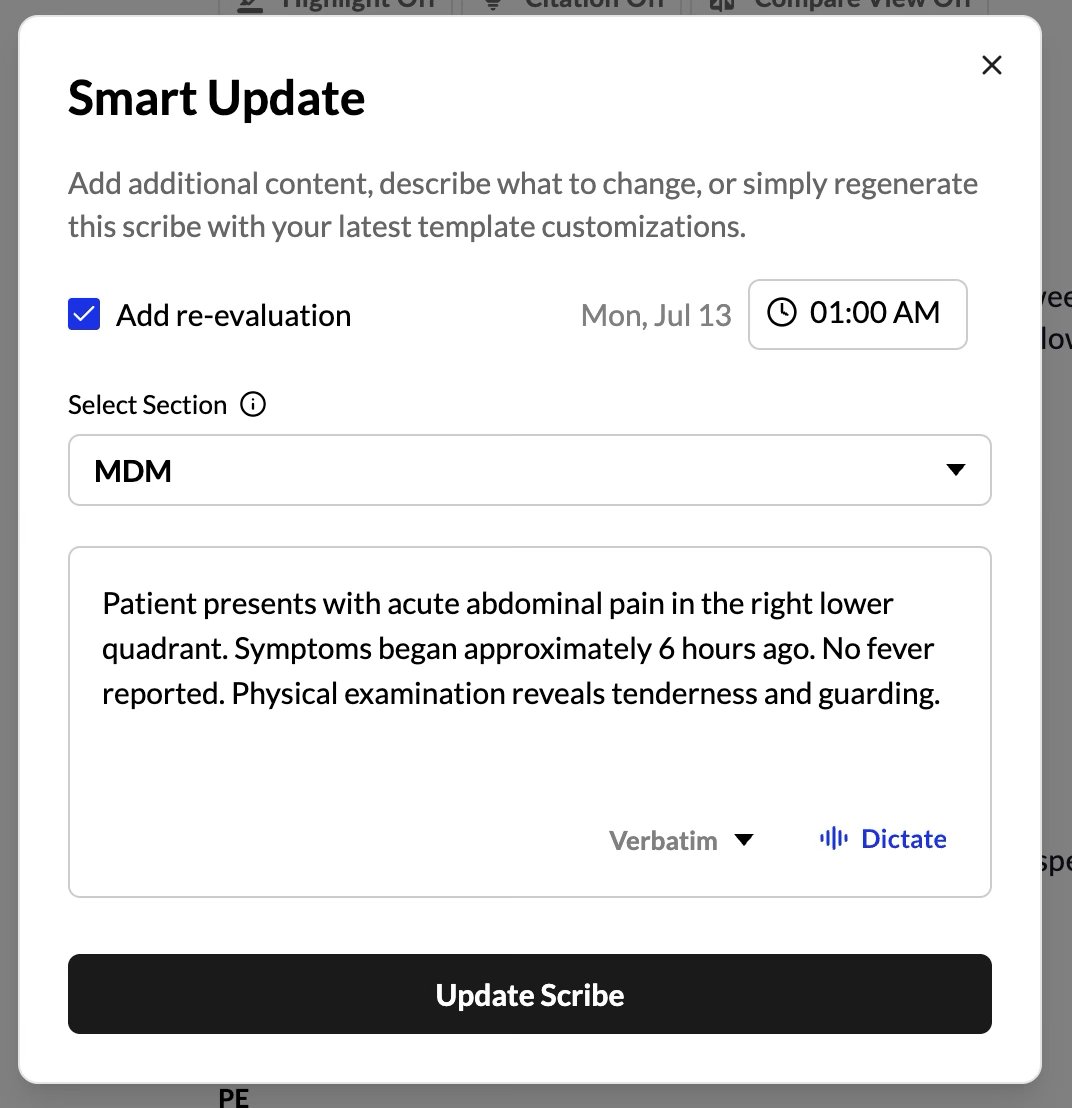
Re-evaluation mode: pick a real section, choose Verbatim or Smart
- Targeted Placement: Re-evaluations render directly under the section they target instead of stacking up at the end of the note. By default, the system selects the MDM section (if your template has one) or the first section of the note.
- Verbatim or Smart Modes: If you choose Verbatim, text appears immediately. If you choose Smart mode or audio, a “Re-evaluation processing” card will display until the task completes.
- Editable Timestamps: Each entry is automatically titled “Re-evaluation – <date, time>”. It defaults to the current time, but includes editable date and time pickers.
- Nested Copying: Using “Copy All” or “Section Copy” will keep your re-evaluations neatly nested under their respective sections, matching what you see in the app.
- Deleting: Simply click the delete button next to a re-evaluation to remove it as needed.
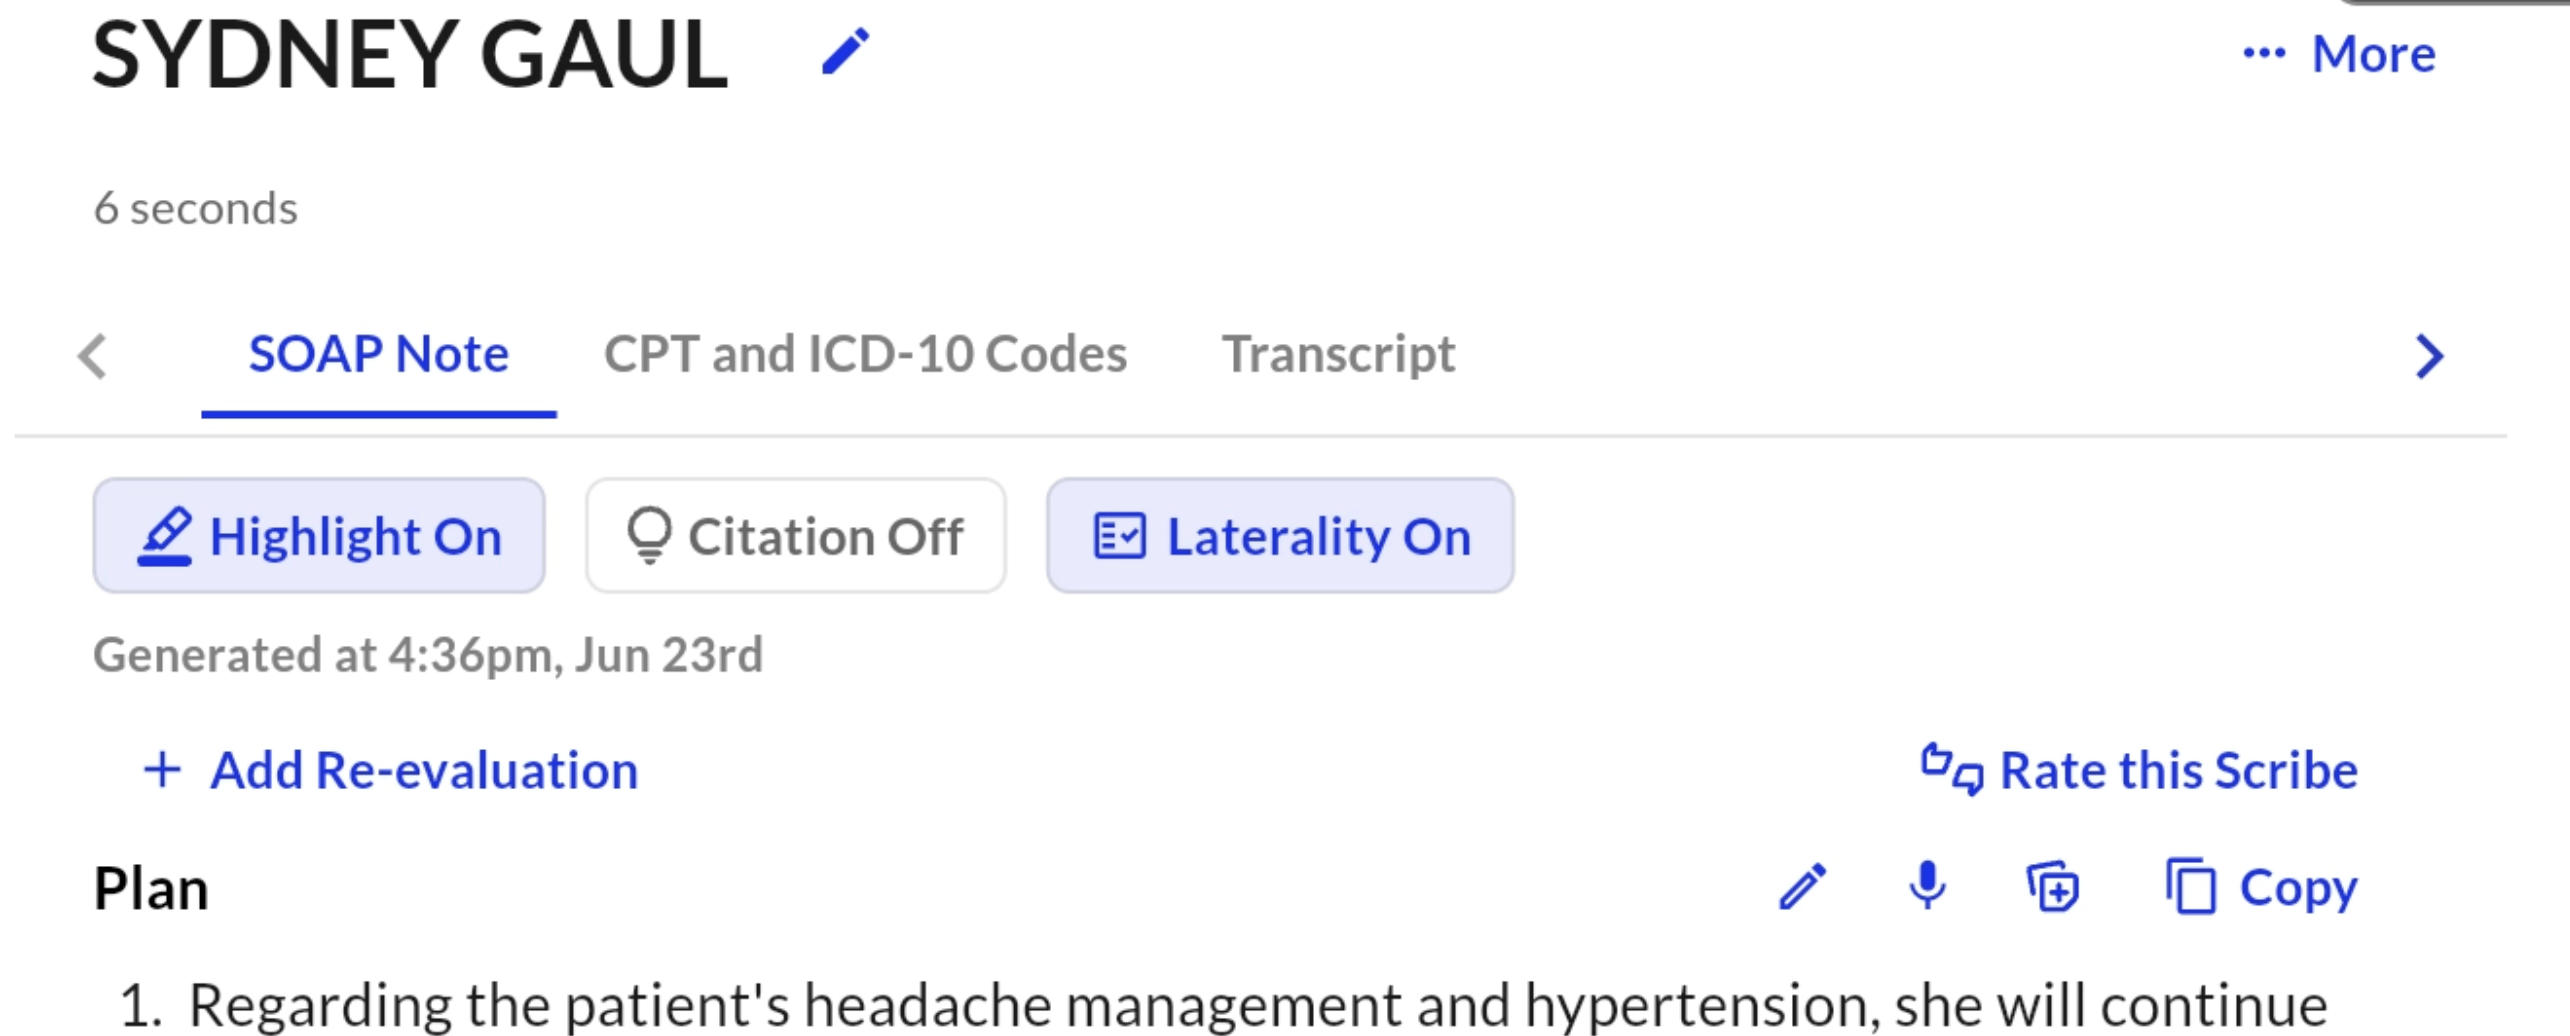
Add Re-evaluation shortcut at the top of the note
Add Re-evaluation shortcut at the top of the note: Tapping it opens Smart Update with Add re-evaluation already checked, rather than the previous standalone dialog. It appears whenever a re-evaluation template is available.
Regenerating a note to apply custom formatting or template changes
Smart Update will be the recommended way to regenerate a note.
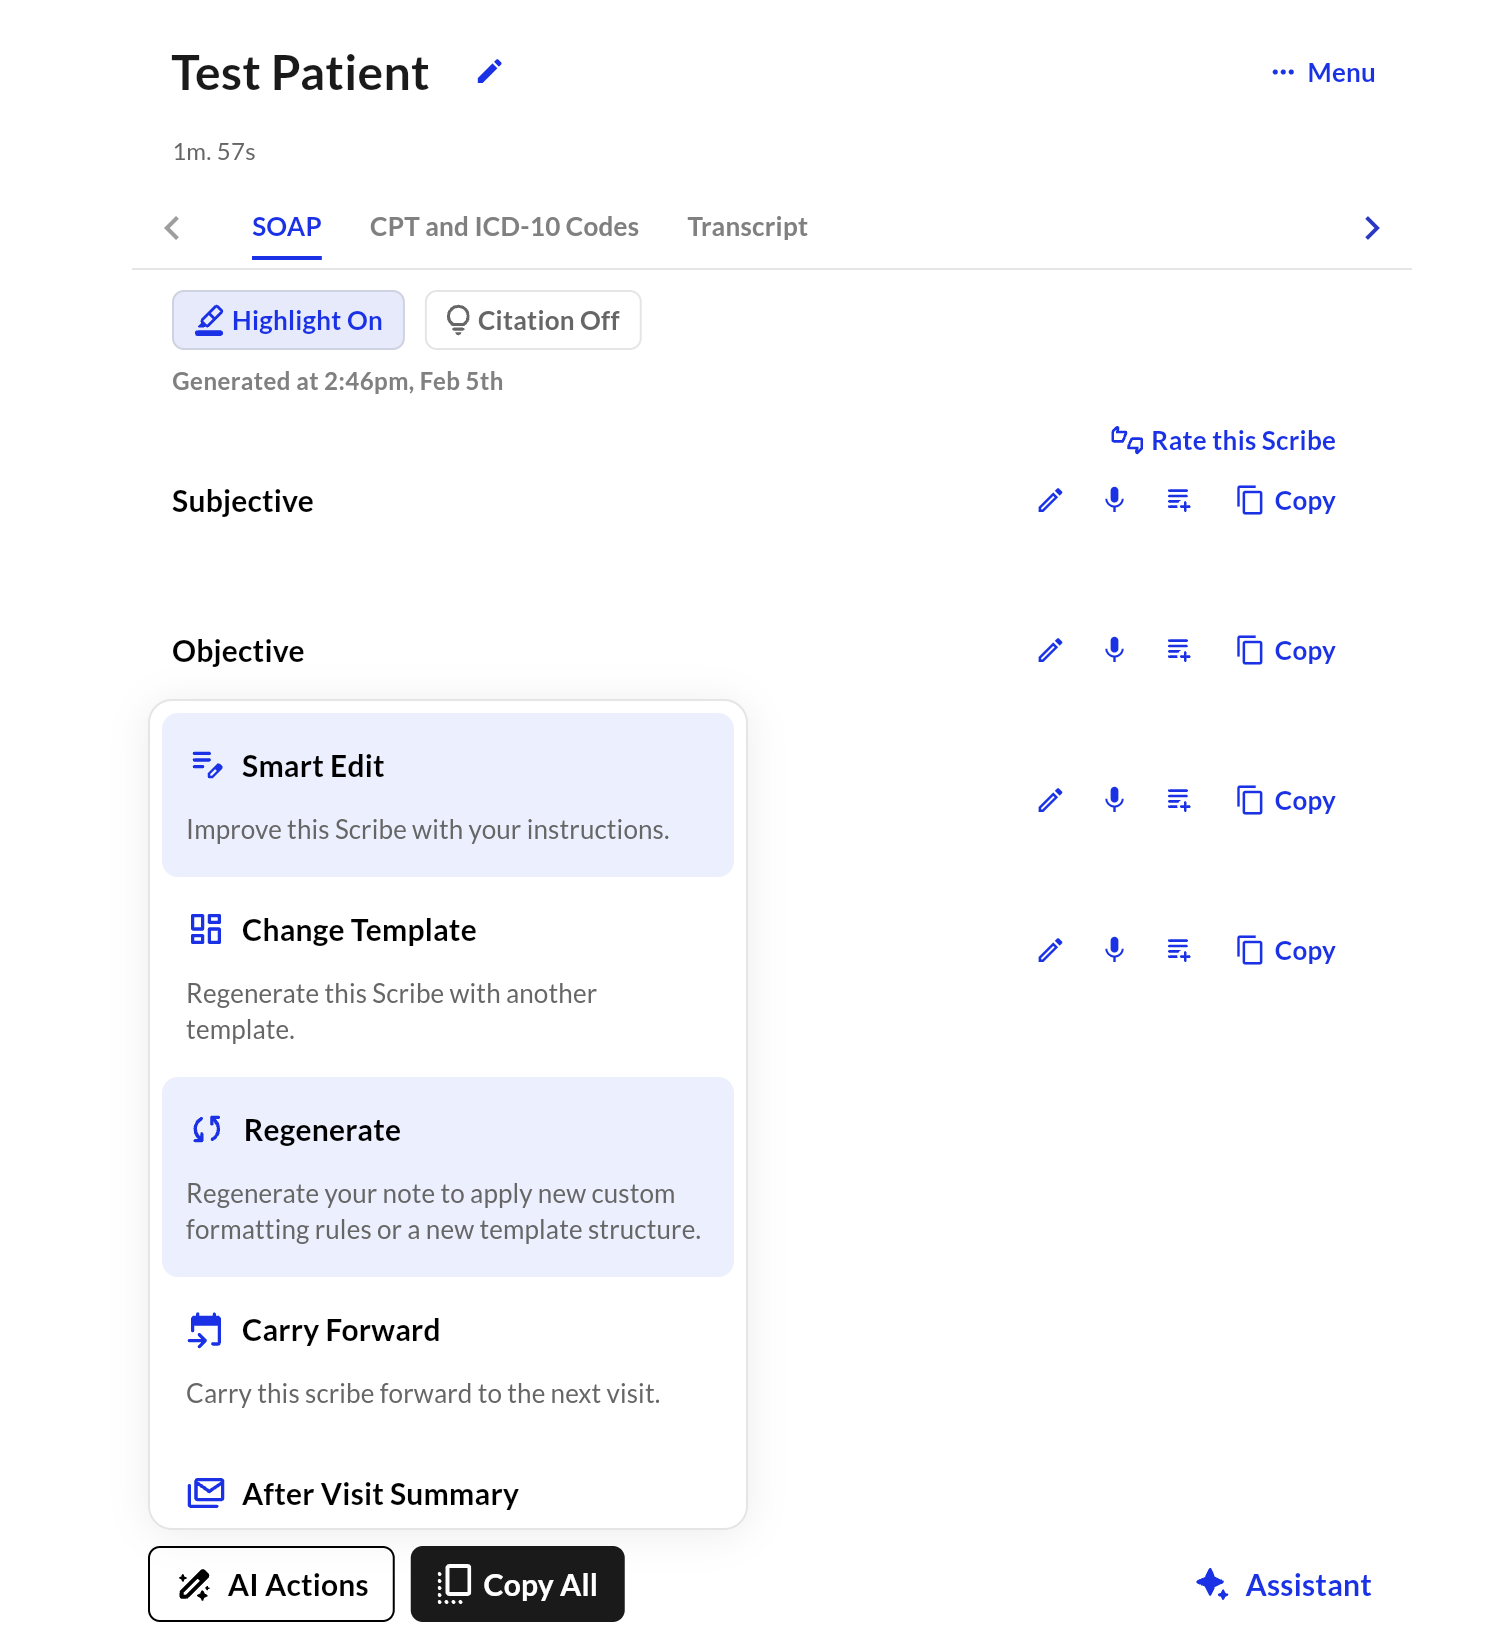
- Locate the generated Scribe you want to update on the “My Scribes” page.
- Click on the “AI Actions” button.
- Select “Regenerate” from the menu.
- The Scribe will now be regenerated with newly added Custom Formatting rules or an updated template structure.
Use Smart Edit to add or record additional context
Smart Edit will be part of Smart Update. Use Smart Update to add context and regenerate a note in one step.
- Open a generated Scribe and click “AI Actions.”
- Select “Smart Edit” from the dropdown menu.
- In the new window, choose the document you want to modify.
- Under Add Context, select “By Audio” or “By Text” based on how you want to add extra context.
- Click “Regenerate” to apply the edits to the note.
Change Template
If the wrong template was selected during recording, go to the generated Scribe.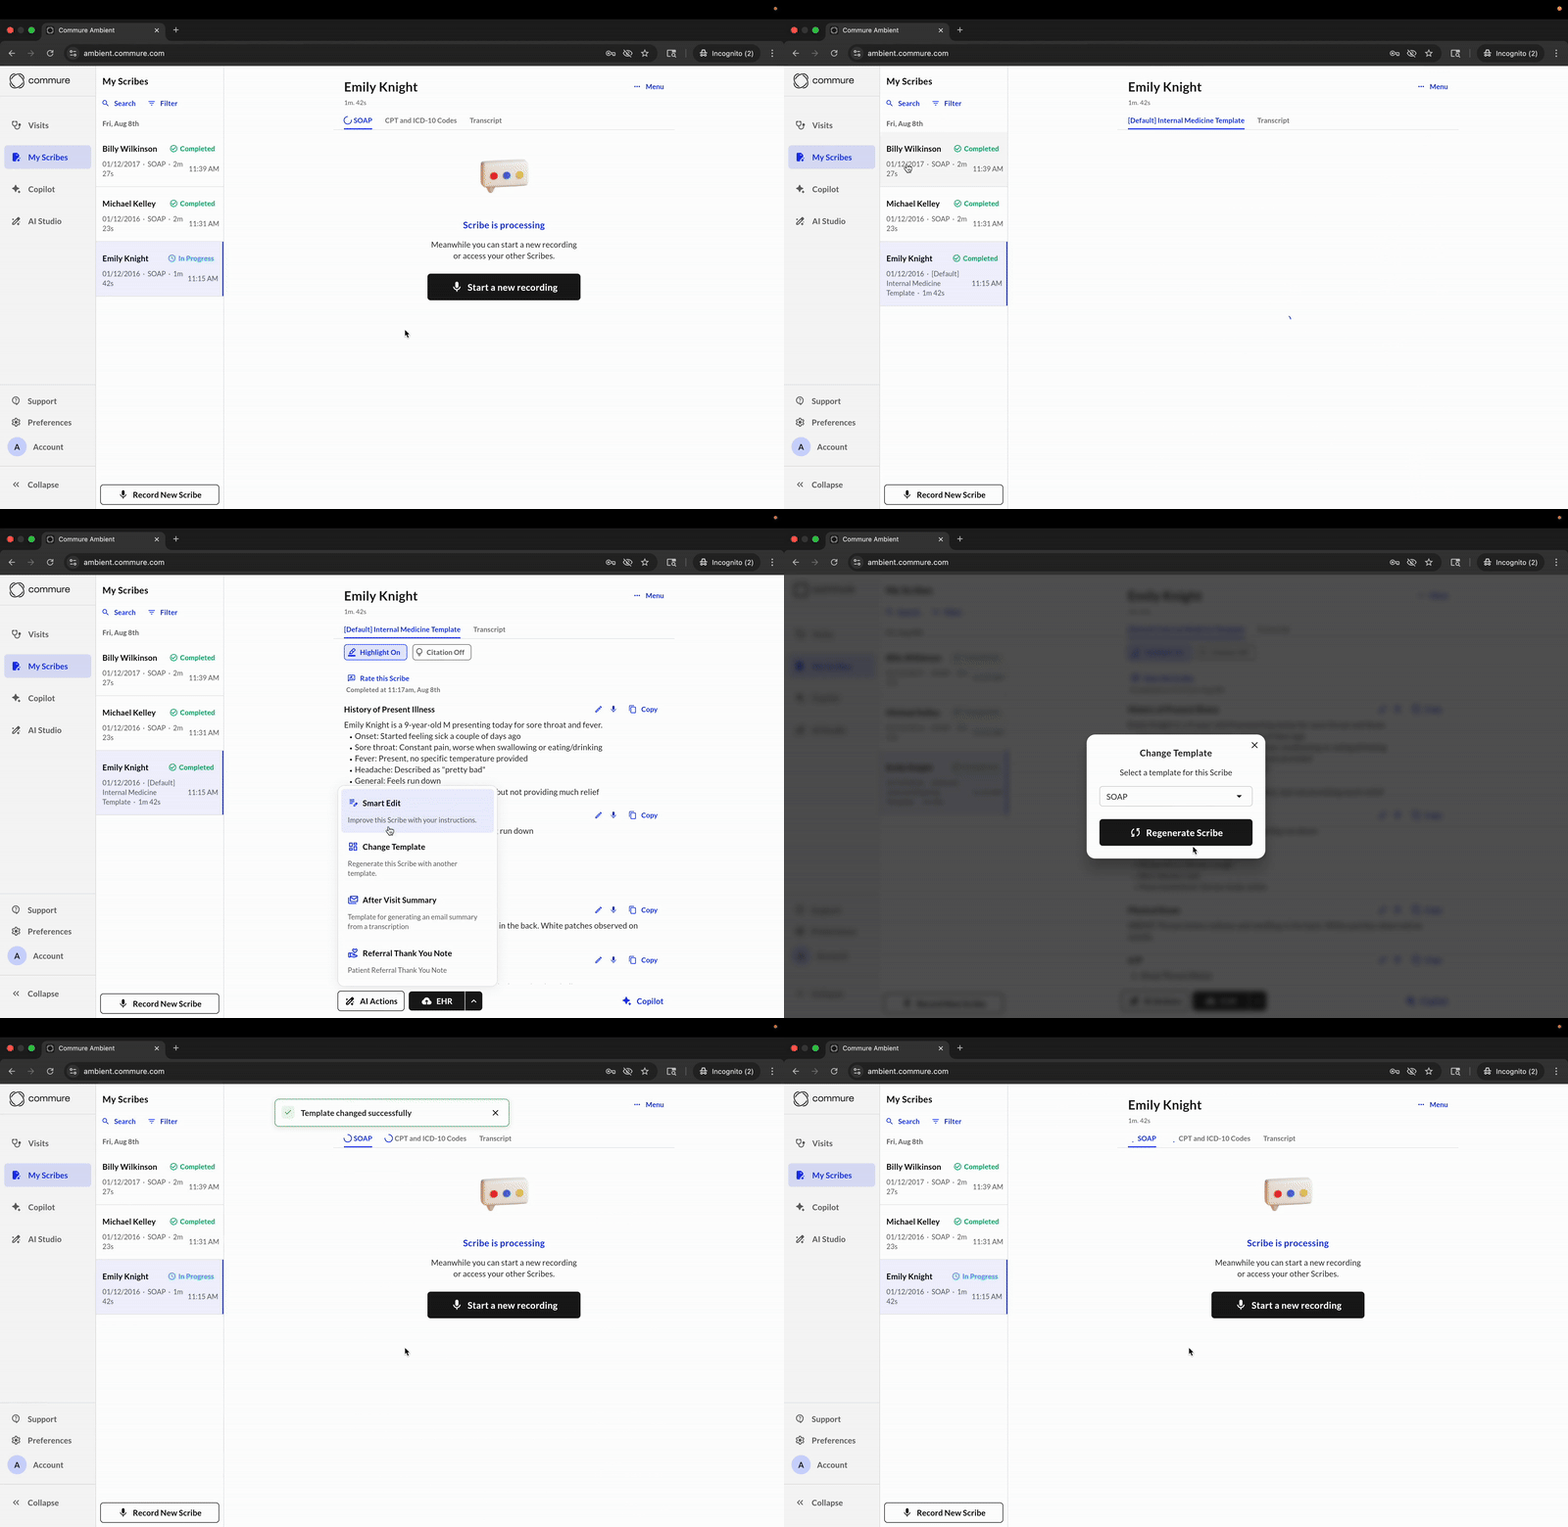
- Select a Scribe under “My Scribes”
- Click “AI Actions” and select “Change Template.”
- In the pop-up window, choose the correct template from the dropdown list.
- Click “Regenerate Scribe” to update the note with the new template.
More Actions
Leaving feedback (Rate My Scribe)
- Click the “Rate My Scribe” button on any generated Scribe.
- A feedback window will appear:
- If you select a 5-star rating, the comments box is optional. You can submit feedback immediately.
- If you select fewer than 5 stars, additional options will appear for you to specify reasons (e.g., Missing Key Information, Inaccurate Information, Poor Formatting/Structure, Extraneous or Irrelevant Content, Other). You may select multiple reasons.
- The “Submit” button will remain disabled until you select at least one reason or enter a comment.
- Click “Submit” to send your feedback.
[NEW] We’ve simplified rating to Thumbs Up or Thumbs Down actions. As we do phased rollouts, if you’re still seeing a 5-star rating, you’ll be seeing the simplified rating system soon!
Deleting a Scribe
To delete a Scribe, click on Menu to open the drop-down. Click “Delete this Scribe”.