Carry Forward
Carry Forward helps providers save time by using relevant information from a patient’s previous visit note with the provider to pre-fill the new note for their current visit. This feature is particularly useful for follow-ups or recurring visits, where much of the patient’s history or previous assessments are still relevant.What Gets Carried Forward?
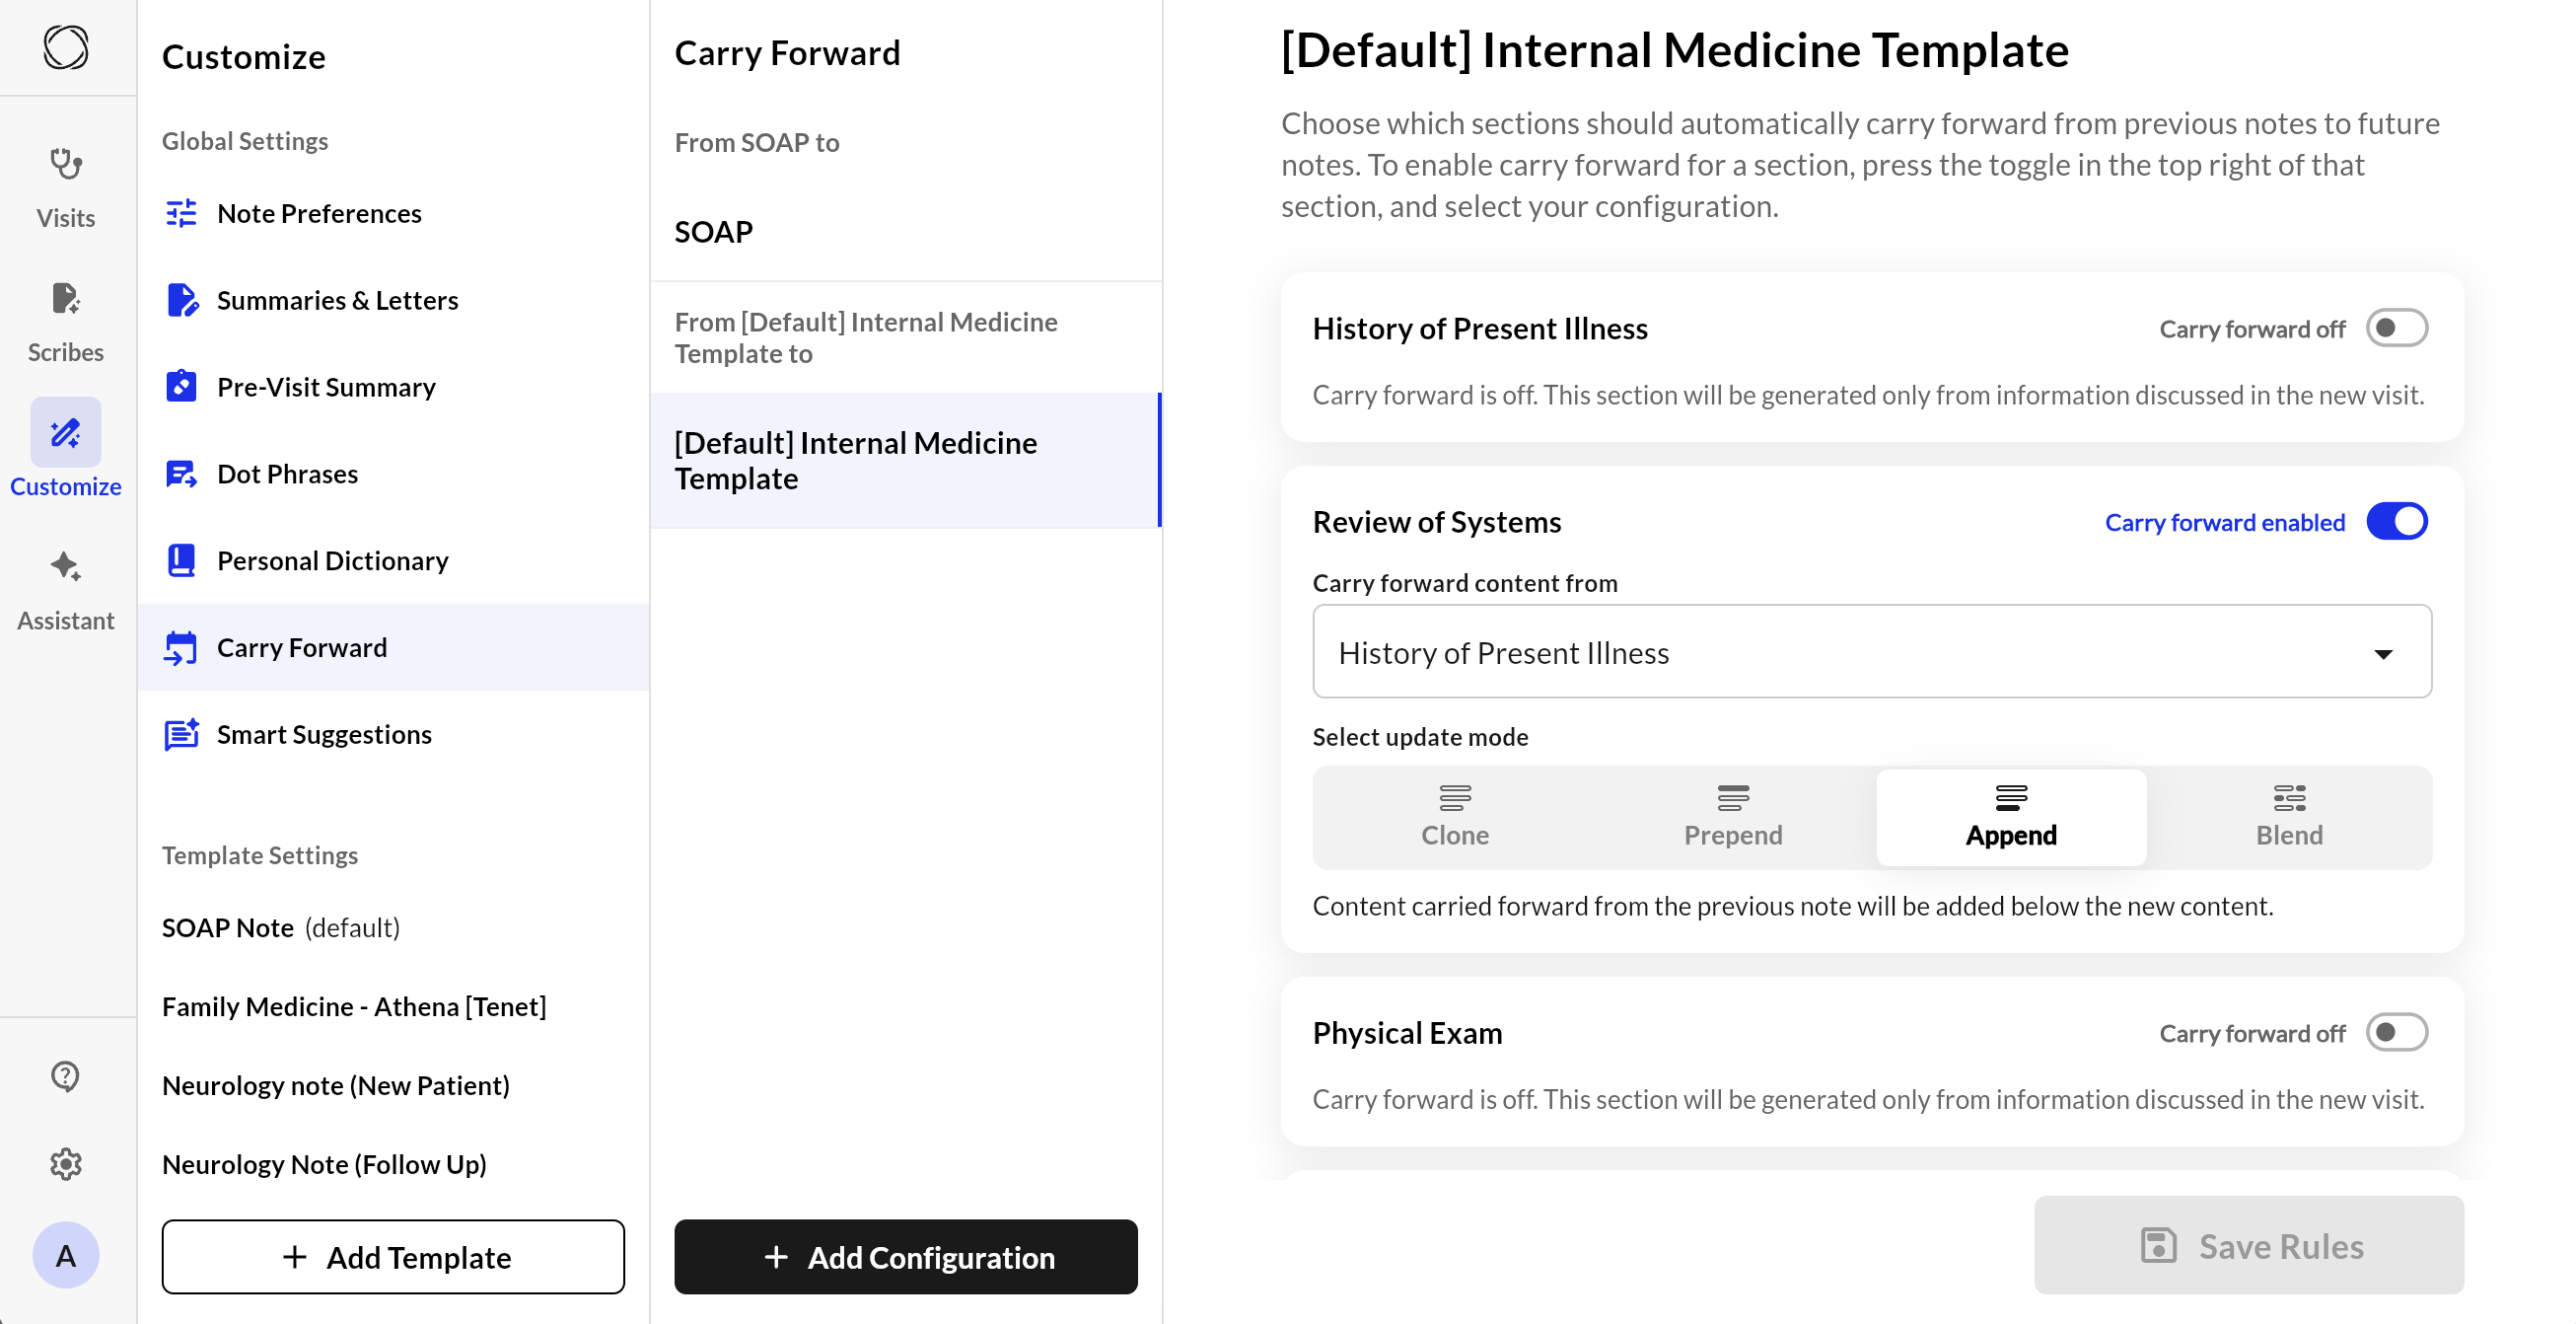
Each section in your note (e.g. Plan, Objective, Subjective, etc.) can behave differently depending on how the template is configured and what selections you make. Here’s what may happen and what you can choose:- Clone: Ignores new input; uses only the previous note’s content.
- Prepend: Previous content is copied and new content is added at the end.
- Append: Places the previous note’s content after the new content.
- Blend: Old and new content are merged together in a cohesive way.
Use Carry Forward
- EHR-Integrated Sites: Once configured, carry forward will appear for eligible notes. The new note is automatically created using content from the previous visit with the same provider. You’ll be taken directly to the editing screen with carried-forward data already populated.
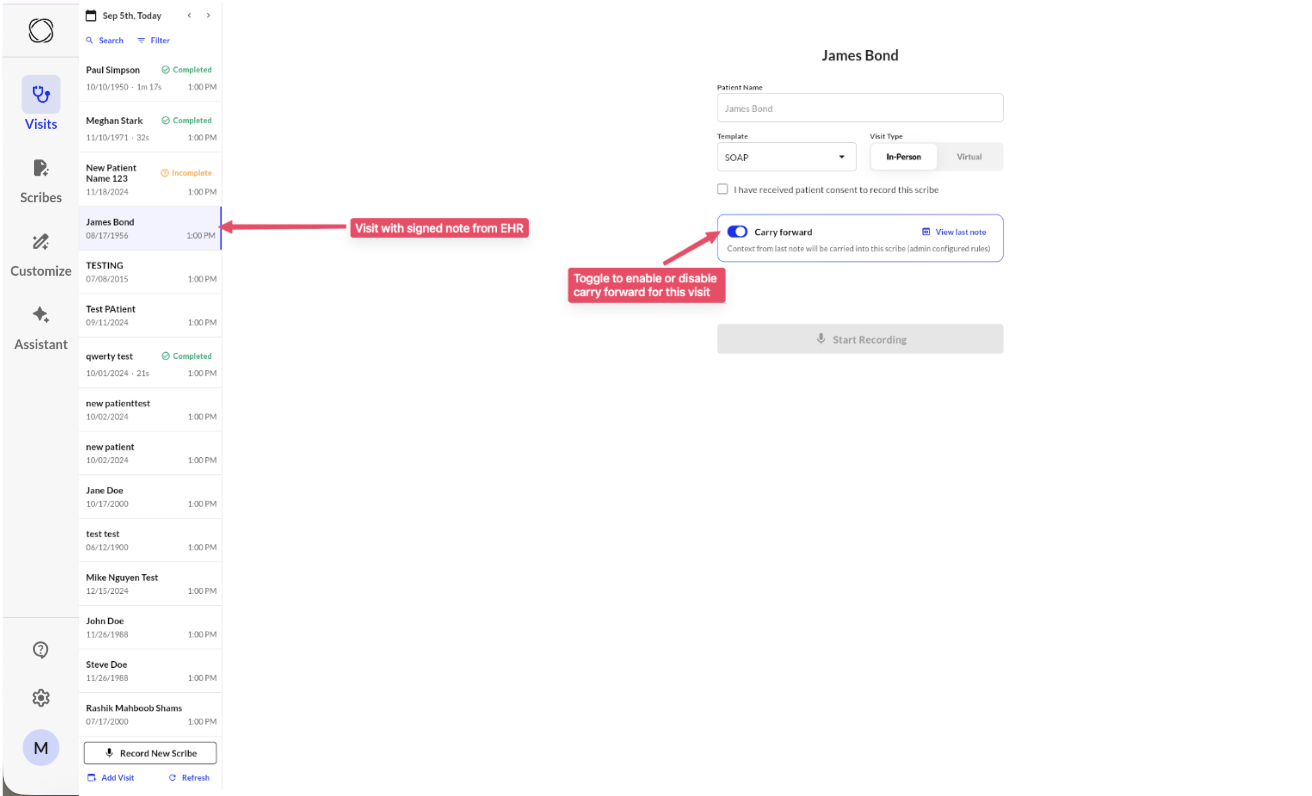
- Non-Integrated Sites: Navigate to your next visit. When you enter the patient name, you’ll be able to choose a past visit with that same patient and verify if you want to set up Carry Forward.
- Collaborator view: Collaborators can now access and enable Carry Forward for their provider.
- Scribe fallback: If a signed note isn’t available, we use the last scribe-generated note.
Set Up Carry Forward:
User Level:- Go to Customize then Carry Forward
- Click on the + Add Configuration button.
- Create carry forward rule mapping between two templates.
- By default, all rules between the templates are disabled. You need to configure the rules using the UI.
- Toggle on and off per at the section-level to enable carry-forward across templates.
Currently, template-level carry forward is setup by Commure which is typically set as site level default for providers associated with the template.
- Start a new Scribe for a patient who already has a previous note in the system. Make sure you select a template that has Carry Forward enabled.
- Capture your visit as usual, adding any new details for the current appointment.
- Generate your note.
- Once the note is ready, click the Compare View toggle. This will highlight the differences so you can easily see exactly what was carried over from the previous visit and what was newly generated.
Smart Logic
Carry Forward uses an advanced language model (LLM) to intelligently decide what to include, how to merge past content, and when to regenerate a section completely. Behind the scenes, the system:- Uses guideline prompts to guide behavior section by section
- Applies system and user roles in the AI call to ensure accurate, role-specific output
- Executes logic modularly to optimize performance and ensure consistent structure
Benefits
- Saves time on repetitive documentation
- Ensures continuity between visits
- Reduces errors by keeping relevant context
- Works with both manual and EHR-integrated workflows
Commure Carry Forward (Non Integrated Flow)
Commure Carry Forward (Integrated Flow)
For more information on details how to this up, please contact sales or your customer support manager.